PAK capture Configuration
With PAK 6.2 it is easy to create a template for PAK capture that can then be used to create a new measurement task.
Preparing a Template in PAK
Please follow these steps:
- Start PAK 6.2
- Open "System/PAK capture configuration"
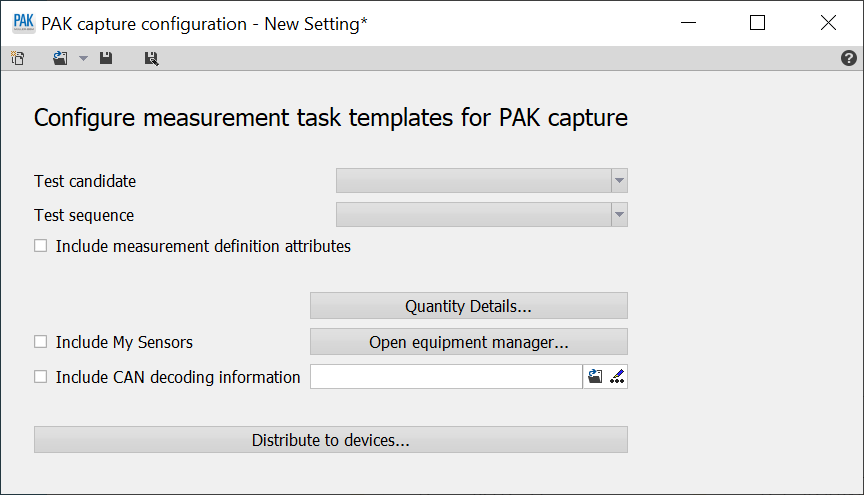
Descriptive Information
The first section of this window allows to specify test candidate, test sequence and descriptive attributes of PAK's measurement definition. The defined masks and fields will be available in PAK capture to enter descriptive attributes.
Quantity Details
With this selection, you can configure which measurement quantities from PAK quantity catalogue are selectable for different types of input. As an example, acceleration is typically measured with ICP®-based or charge sensors. In the window "Quantity details" in that case you would check the columns "ICP" and "Charge" for this quantity.
Note: ICP® does not refer to the MKII module name but to the ICP® property that is available on several MKII modules (as ICS42S G2, WSB42X G2, MIC42X G2 et al.)
Sensors
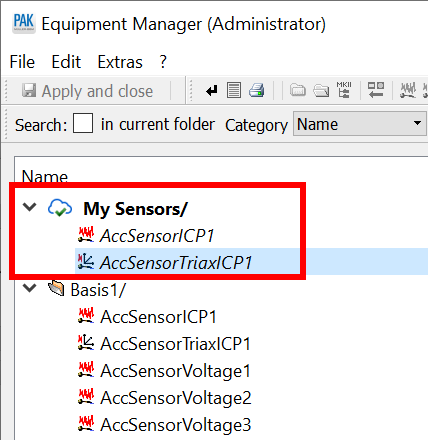
In this line you can specify if you want to include sensor information into your template. For this you have to
- select the option "Include My Sensors"
- add sensors to the section "My Sensors" in PAK Equipment Manager
CAN decoding
With PAK capture you can either store the complete CAN raw data stream or - e.g. if you need values for display during the measurement - decode CAN information on the PAK MKII. For this, you can specify a decoding information typically based on a DBC file.
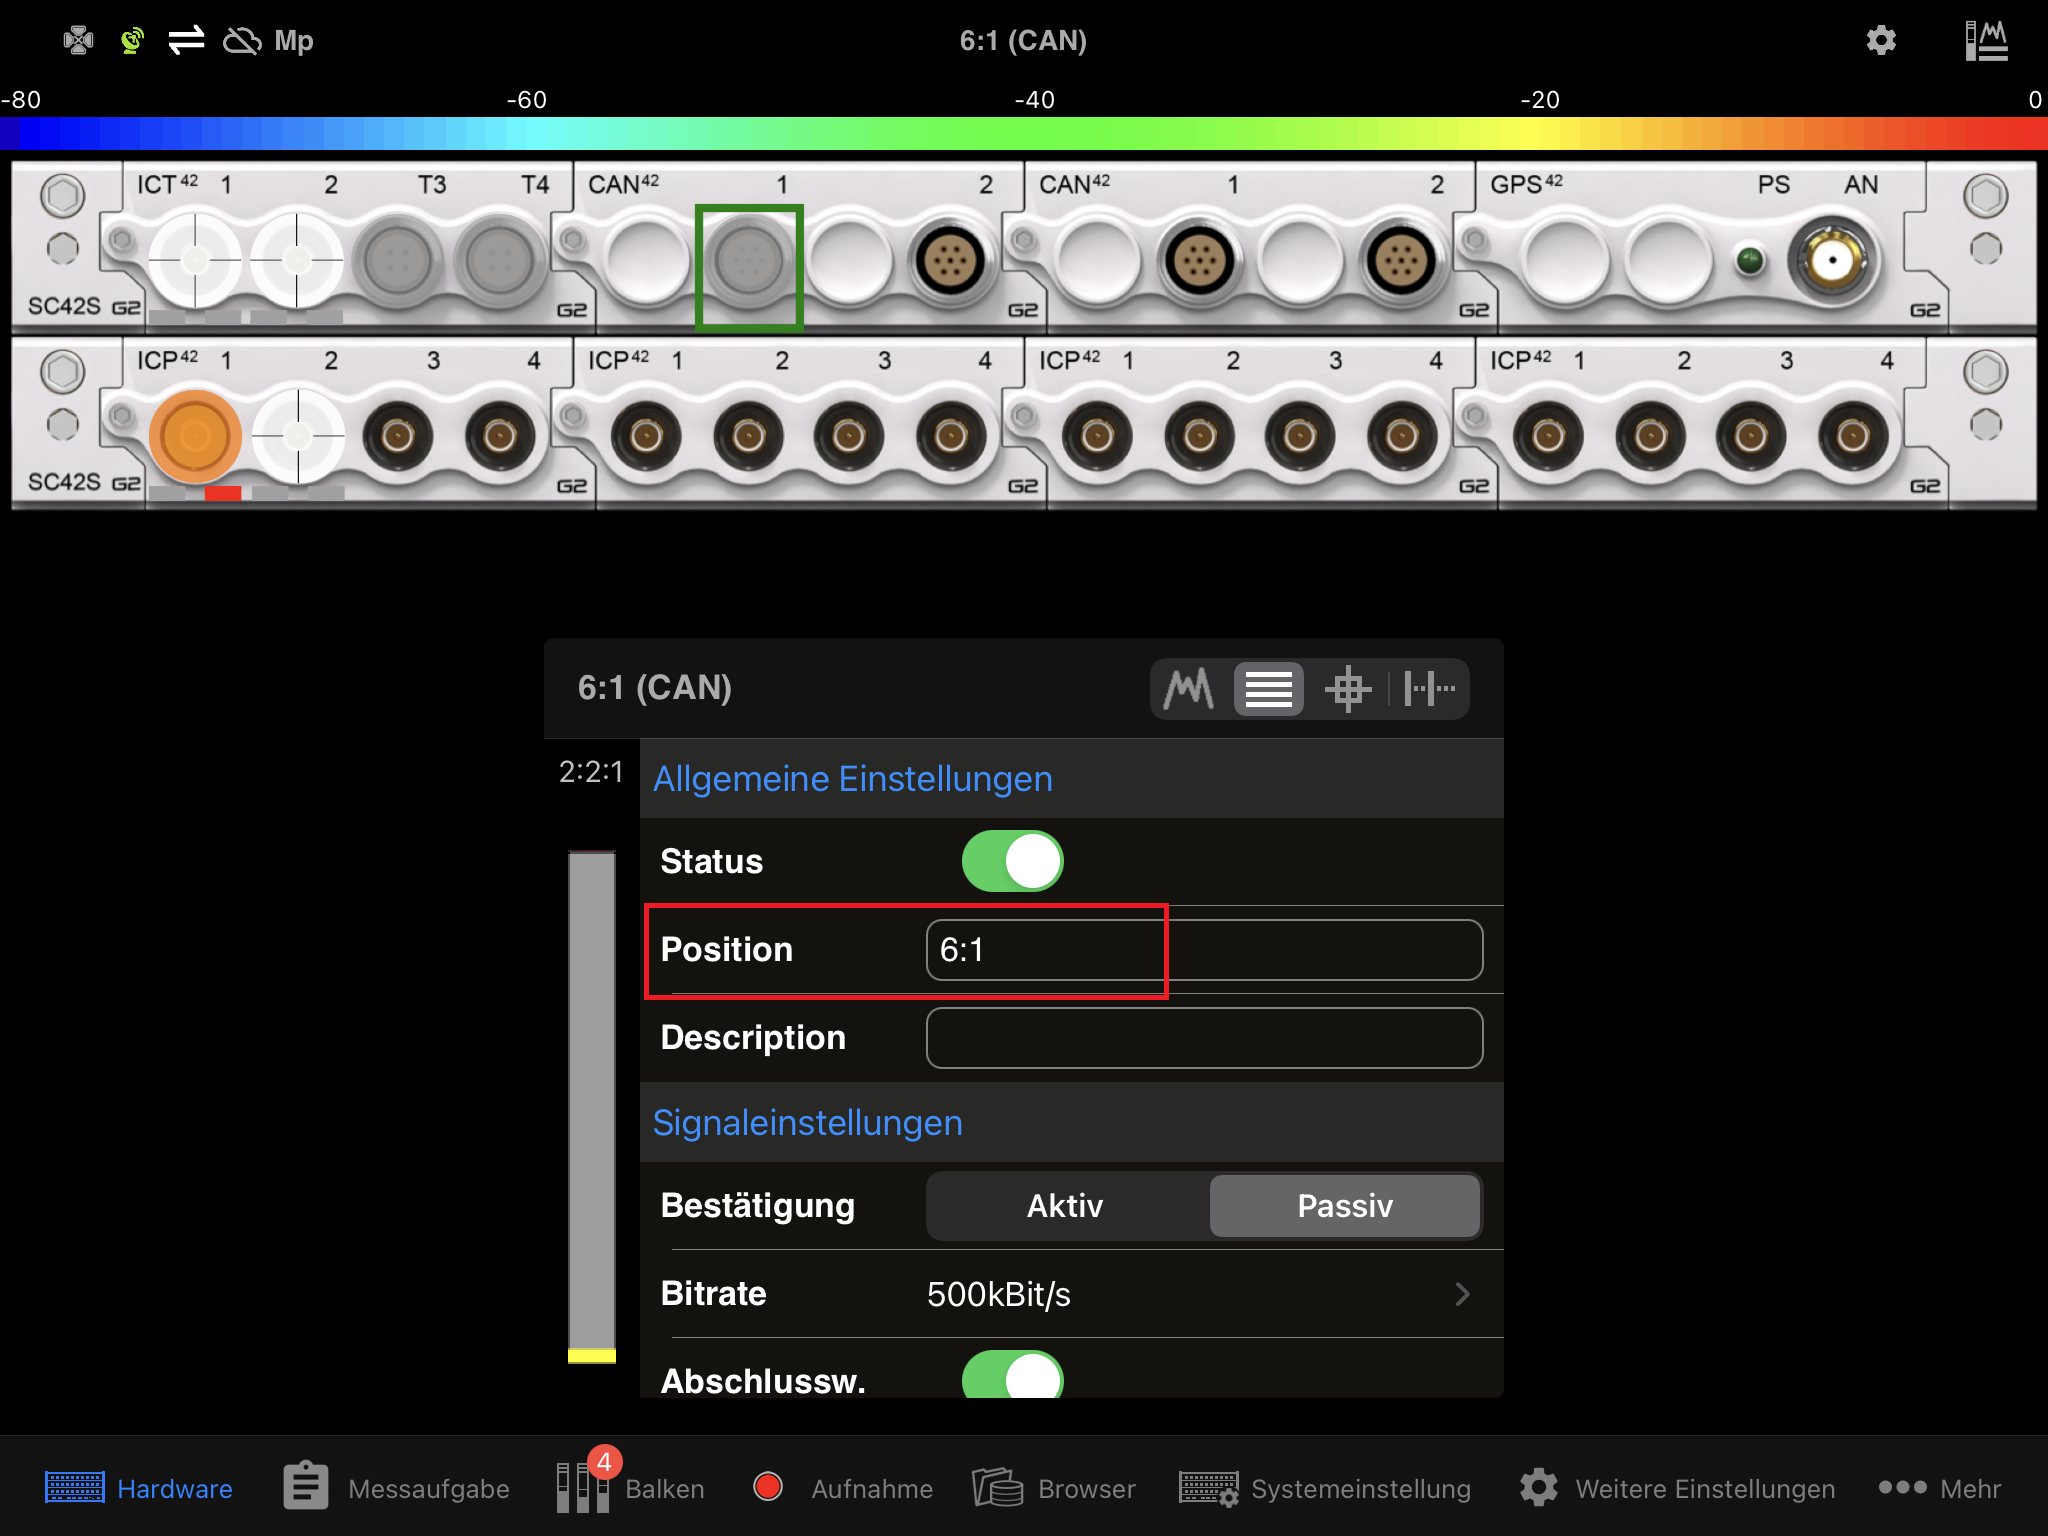
- in the CAN decoding interface it is necessary to enter the correct value for the "Raw Data Position Label".
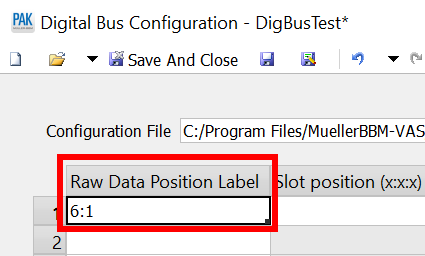
This can be found in the PAK capture app when selecting the configuration options of the corresponding CAN adapter:
More information
To learn how to configure a measurement task from this template in PAK capture please refer to this tutorial